In some situations, we want to send sms messages from our own Android application. There are two different ways to do such a thing:
The use of SmsManager facilitates the sms sending because it gives us the opportunity to customize this functionality with the manner we want, within our own Activity. In parallel, the use of Intents implies the use of built-in applications and sms clients that are installed in each Android device. In this example, we are going to implement both ways. More specifically, we are going to send a sms by using SmsManager and implicit Intent withSENDTO action and/or VIEW action.
2. Create the layout of the Main Activity
We will put two EditTexts so that the user can fill in a phone number and a message for a SMS. Also, we are going to add three different Buttons, that each one enables a different action and uses a suitable class (smsManager, Intent withSENDTO action, Intent with VIEW action).
Open res/layout/activity_main.xml and go to the respective xml tab. Then paste the following.
activity_main.xml:
| <?xml version="1.0" encoding="utf-8"?>
<LinearLayout xmlns:android="http://schemas.android.com/apk/res/android"
android:id="@+id/linearLayout1"
android:layout_width="fill_parent"
android:layout_height="fill_parent"
android:orientation="vertical" >
<TextView
android:id="@+id/text"
android:layout_width="fill_parent"
android:layout_height="wrap_content"
android:text="Complete the fields to send a sms"
android:textAppearance="?android:attr/textAppearanceMedium" />
<EditText
android:id="@+id/phoneNumber"
android:layout_width="fill_parent"
android:layout_height="wrap_content"
android:ems="10"
android:hint="ex: 1234567890"
android:inputType="phone" />
<EditText
android:id="@+id/smsBody"
android:layout_width="fill_parent"
android:layout_height="80dp"
android:layout_marginBottom="30dp"
android:hint="Write your sms here...." />
<Button
android:id="@+id/smsManager"
android:layout_width="fill_parent"
android:layout_height="wrap_content"
android:text="Send the sms by SmsManager" />
<Button
android:id="@+id/smsSIntent"
android:layout_width="fill_parent"
android:layout_height="wrap_content"
android:text="Send the sms by SENDTO" />
<Button
android:id="@+id/smsVIntent"
android:layout_width="fill_parent"
android:layout_height="wrap_content"
android:text="Send the sms by VIEW" />
</LinearLayout>
|
3. Code the Main Activity
SmsManager handles SMS operations and getDefault() method should be called, in order to get an instance of this object. For the intent with ACTION_SENDTO we have to define the data as smsto: and the phone number added at the end. Respectively, for the intent with ACTION_VIEW we will define the type as vnd.android-dir/mms-sms, so only sms-mms providers will launch. Also, we have to add the phone number and the message as extra fields to that intent.
Open src/com.javacodegeeks.android.sendsmstest/MainActivity.java and paste the following.
MainActivity.java:
| package com.sbg.android.sendsmstest;
import android.app.Activity;
import android.content.Intent;
import android.net.Uri;
import android.os.Bundle;
import android.telephony.SmsManager;
import android.view.View;
import android.view.View.OnClickListener;
import android.widget.Button;
import android.widget.EditText;
import android.widget.Toast;
public class MainActivity extends Activity {
private EditText phoneNumber;
private EditText smsBody;
private Button smsManagerBtn;
private Button smsSendToBtn;
private Button smsViewBtn;
@Override
public void onCreate(Bundle savedInstanceState) {
super.onCreate(savedInstanceState);
setContentView(R.layout.activity_main);
phoneNumber = (EditText) findViewById(R.id.phoneNumber);
smsBody = (EditText) findViewById(R.id.smsBody);
smsManagerBtn = (Button) findViewById(R.id.smsManager);
smsSendToBtn = (Button) findViewById(R.id.smsSIntent);
smsViewBtn = (Button) findViewById(R.id.smsVIntent);
smsManagerBtn.setOnClickListener(new OnClickListener() {
public void onClick(View view) {
sendSmsByManager();
}
});
smsSendToBtn.setOnClickListener(new OnClickListener() {
public void onClick(View view) {
sendSmsBySIntent();
}
});
smsViewBtn.setOnClickListener(new OnClickListener() {
public void onClick(View view) {
sendSmsByVIntent();
}
});
}
public void sendSmsByManager() {
try {
// Get the default instance of the SmsManager
SmsManager smsManager = SmsManager.getDefault();
smsManager.sendTextMessage(phoneNumber.getText().toString(),
null,
smsBody.getText().toString(),
null,
null);
Toast.makeText(getApplicationContext(), "Your sms has successfully sent!",
Toast.LENGTH_LONG).show();
} catch (Exception ex) {
Toast.makeText(getApplicationContext(),"Your sms has failed...",
Toast.LENGTH_LONG).show();
ex.printStackTrace();
}
}
public void sendSmsBySIntent() {
// add the phone number in the data
Uri uri = Uri.parse("smsto:" + phoneNumber.getText().toString());
Intent smsSIntent = new Intent(Intent.ACTION_SENDTO, uri);
// add the message at the sms_body extra field
smsSIntent.putExtra("sms_body", smsBody.getText().toString());
try{
startActivity(smsSIntent);
} catch (Exception ex) {
Toast.makeText(MainActivity.this, "Your sms has failed...",
Toast.LENGTH_LONG).show();
ex.printStackTrace();
}
}
public void sendSmsByVIntent() {
Intent smsVIntent = new Intent(Intent.ACTION_VIEW);
// prompts only sms-mms clients
smsVIntent.setType("vnd.android-dir/mms-sms");
// extra fields for number and message respectively
smsVIntent.putExtra("address", phoneNumber.getText().toString());
smsVIntent.putExtra("sms_body", smsBody.getText().toString());
try{
startActivity(smsVIntent);
} catch (Exception ex) {
Toast.makeText(MainActivity.this, "Your sms has failed...",
Toast.LENGTH_LONG).show();
ex.printStackTrace();
}
}
}
|
4. Set the SMS Permission
We should set SEND_SMS as permission in the AndroidManifest.xml file, in order to send an SMS via our application. At this point, we should mention that the permission must be defined for smsManager, but it is not necessary for the implicit Intents.
Open AndroidManifest.xml file and go to the respective xml tab. Then paste the permission android.permission.SEND_SMS, as you can see below.
AndroidManifest.xml:
| <?xml version="1.0" encoding="utf-8"?>
<manifest xmlns:android="http://schemas.android.com/apk/res/android"
package="com.dfd.android.sendsmstest"
android:versionCode="1"
android:versionName="1.0" >
<uses-sdk
android:minSdkVersion="8"
android:targetSdkVersion="19" />
<uses-permission android:name="android.permission.SEND_SMS" />
<application
android:allowBackup="true"
android:icon="@drawable/ic_launcher"
android:label="@string/app_name"
android:theme="@style/AppTheme" >
<activity
android:name="com.javacodegeeks.android.sendsmstest.MainActivity"
android:label="@string/app_name" >
<intent-filter>
<action android:name="android.intent.action.MAIN" />
<category android:name="android.intent.category.LAUNCHER" />
</intent-filter>
</activity>
</application>
</manifest>
|
5. Run the application
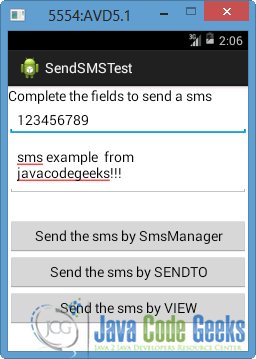
To run our application, right click on our project → Run as → Android Application. The AVD will appear with the app loaded.
Fill in a phone number and a message in order to send a sms, as shown in the picture below.
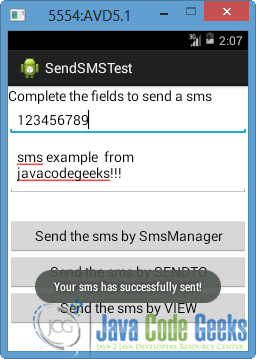
Lets press “Send the sms by SmsManager” button. The sms will be sent via smsManager, so a Toast will appear which certify the success of sms sending. Otherwise, an error message would be appeared.
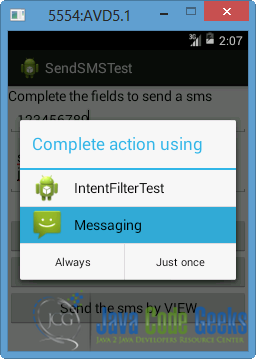
Now press the “Send the sms by SENDTO” button. If more than one applications, that use a SENDTO action exist, the user will choose one of the displayed ones. For example, our emulator contains an application that uses an implicit intent withACTION_SENDTO, as shown in the picture.
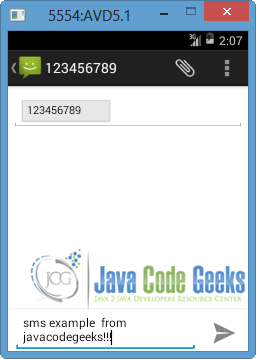
Lets choose the default Android app for sms. As you can see in the picture below, the fields are completed with the elements that the user gave previously.
Finally if we press the “Send the sms by VIEW” button, the device’s Built-in SMS application will launch with the appropriate fields filled in, same as shown in the image above.